為什麼要自動化來協助寫作?
前置作業:Notion Integration Token 申請
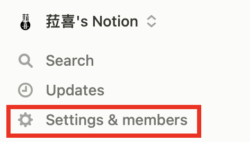
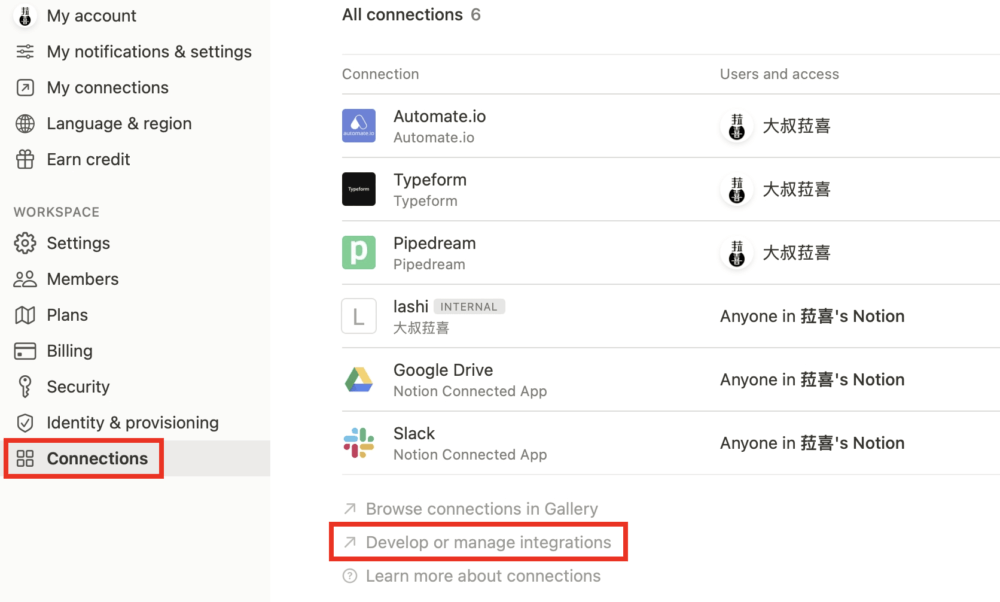
從左上角的 「Settings & members 」進入設定頁面。
點擊左下方的 Connections ,找到頁面下方的 Develop or manage integrations。
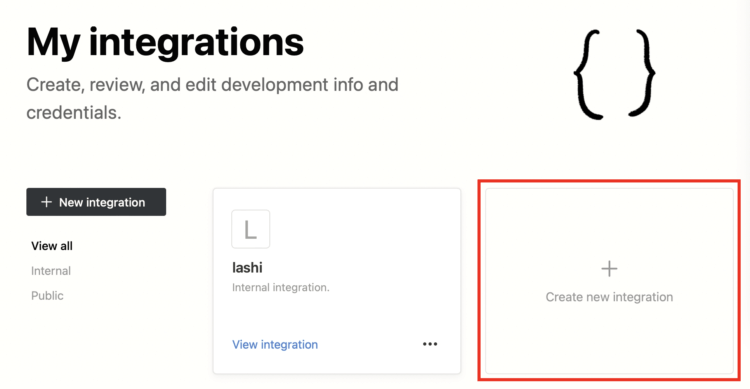
進入頁面後,點擊 Create new integration。
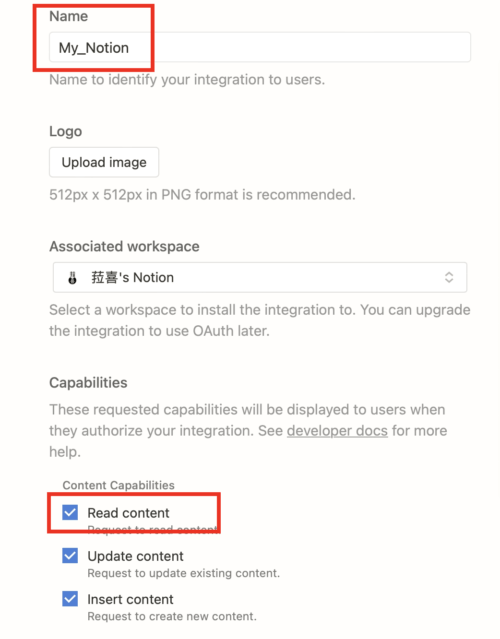
輸入自訂名稱,確認 Read content 有打勾,點擊「Submit」即可。
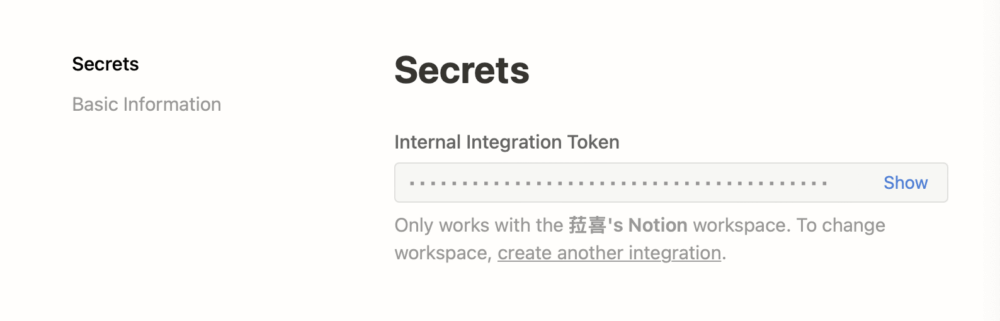
這樣就完成 Internal Integration Token 的申請,請將 Token 存在某個地方,等一下我們需要使用。
前置作業:Database Connect
完成 Notion Integration Token 申請後,請不要忘了新增一個 Notion Database ,並且將 Notion Connecting 設定好。


前置作業:準備 Python 程式環境 Google Colab
Google Colab,全名 Google Colaboratory,是 Google 為了推廣機器學習所提供的一個研究工具。它是一個完全基於雲端的 Jupyter 筆記本環境,能夠在瀏覽器中撰寫和執行 Python 等多種語言的程式碼,不需要任何設定。此外,Google Colab 提供了免費的 GPU 使用,使得執行機器學習和深度學習的程式碼更為便利。你可以隨時隨地、在任何裝置上,只需一個 Google 帳戶和網路連線,就能使用 Google Colab 進行程式學習和資料分析。
網址:https://colab.research.google.com/?hl=zh-tw
這次我們要用 Query a database 服務,這個功能和之前的 List databases 有個很大的不同,就是加上了過濾器 Filter ,因為我們並不想要取得所有的項目,而是部份滿足特定條件的項目。
那可以輸入程式:
以上是個簡單的 Python 程式碼示例,請自行替換 notion_database_id 和 notion_integration_token ,並確保資料庫中有新增 Property checkbox 並且打勾。

步驟二:取得 Notion Page 內容
獲取 database Properties 後,接下來我們想取得 Notion Page 內容,這必須使用 Retrieve block children 功能。

依 Notion API Guides 的內容,我們可以輸入程式:
import requests
import json</p>
<p>page_id = 'c30e4aa7-7dcc-4a64-bcf5-b0a08c003b15'
notion_integration_token = 'secret_MgXY2xxxxxxxxxxxxxxxxxVfw7NoxxQBls'</p>
<p>def get_content(page_id, notion_integration_token):
headers = {
"Authorization": f"Bearer {notion_integration_token}",
"Content-Type": "application/json",
"Notion-Version": "2022-06-28"
}</p>
<pre><code># 初始化URL和空列表用于存储所有blocks
url = f"https://api.notion.com/v1/blocks/{page_id}/children"
all_blocks = []
more_data = True
start_cursor = None

while more_data:
    # 如果有分页,添加cursor参数到请求中
    if start_cursor:
        url_with_cursor = f"{url}?start_cursor={start_cursor}"
    else:
        url_with_cursor = url

    response = requests.get(url_with_cursor, headers=headers)

    if response.status_code == 200:
        data = response.json()
        all_blocks.extend(data.get('results', []))  # 添加当前页的blocks到总列表
        more_data = data.get('has_more', False)  # 检查是否还有更多数据
        start_cursor = data.get('next_cursor')  # 获取下一个cursor
    else:
        raise Exception(f"Failed to fetch content: {response.status_code}, URL: {url_with_cursor}")

return all_blocks
content = get_content(page_id,notion_integration_token)
print(content)
簡單變數說明:
你取得資料為所有的 blocks ,但我們只是想要 blocks 的內容的部份。

步驟三:將 Block 轉成 HTML 資料
找到 Page Content 的資料後,在上傳到 WordPress 之前,我們還需要一個重要的動作,就是將資料轉換成 WordPress 可以讀取的內容,像是 HTML 檔案。
怎麼做呢? 我們可以輸入程式:
這步驟困難在於轉換成 HTML 時,需要考慮許多不同的格式,包含 H2 大標題、H3 小標題、Text 文字、Image 圖片…等,所有我們可能會用到的格式。
上面的的範本只有 H2 喔! 剩下的,請看下去…
更多完成的文件:Reference – REST API Handbook | Developer.WordPress.org
測試 REST API:可以通過訪問以下 URL 來測試 REST API 是否運作正常。